
Is It Possible to Fix a Bathtub Painted with Wall Paint?
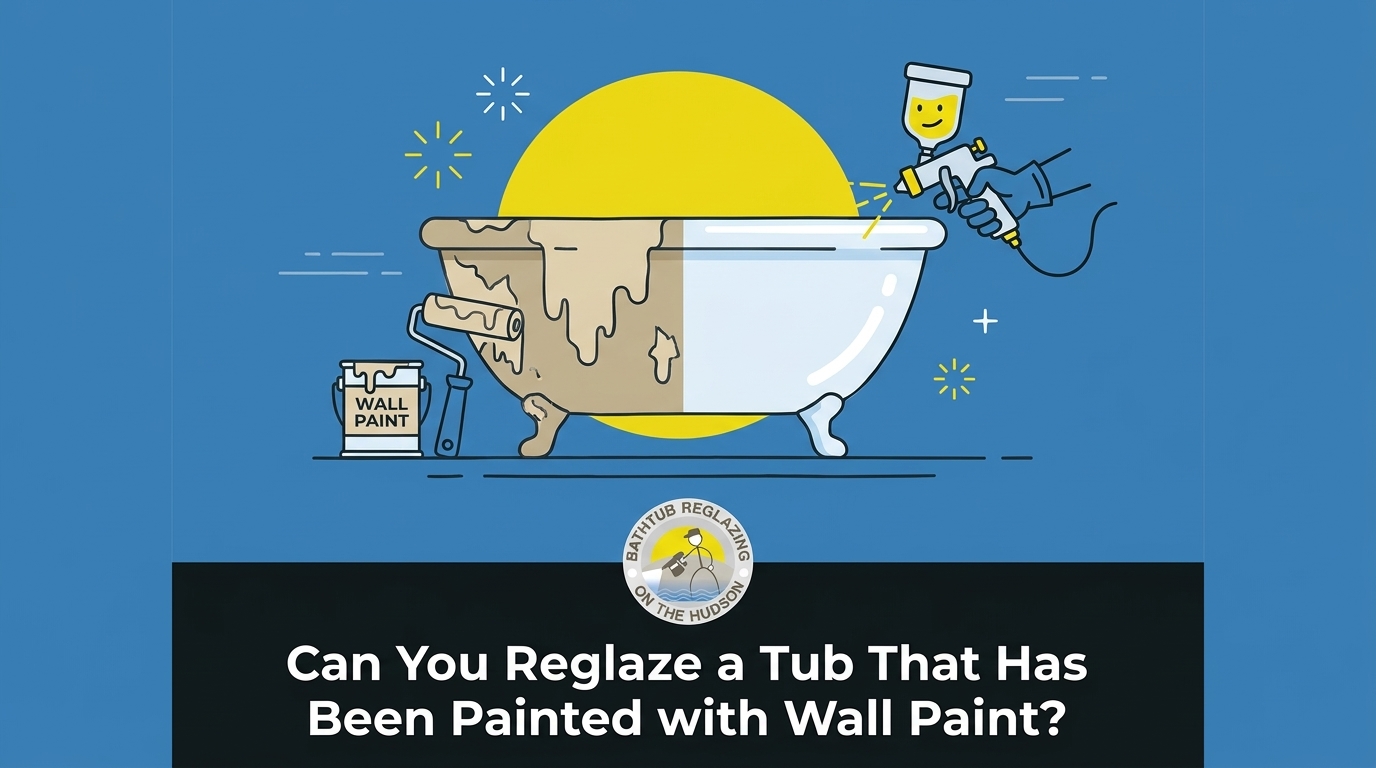
Can you reglaze a tub that has been painted with wall paint? If you have recently moved into a new property and discovered that the pristine white bathtub is suddenly peeling in rubbery sheets, you are likely asking yourself this exact question. At Bathtub Reglazing On The Hudson, our team frequently helps homeowners facing this exact frustrating scenario. Yes, a bathtub painted with wall paint can be reglazed, but the improper latex paint must first be completely chemically stripped down to the original substrate by a professional.
We consistently see homeowners uncover this DIY disaster shortly after purchasing a flipped property. To save time and avoid the cost of proper resurfacing, previous owners sometimes roll or spray standard interior latex paint over outdated bathroom fixtures. While this might look acceptable in real estate listing photos, standard wall paint is fundamentally incapable of withstanding the rigors of a wet environment. Once you begin using the shower regularly, the paint quickly absorbs moisture, bubbles, and flakes away, revealing the original—often stained or brightly colored—surface underneath.
This pattern is especially common in the Peekskill NY and Hudson Valley older homes we service, where vintage cast iron and heavy steel fixtures are prevalent. Rather than preserving these incredibly durable original tubs, untrained renovators attempt cosmetic cover-ups that inevitably fail. When this happens, our advice is never to apply another layer of paint. Fixing the issue requires a technical restoration process to remove the compromised material entirely. For those facing this exact scenario, professional bathtub reglazing is the only permanent way to restore the fixture's aesthetic and functional integrity.
The Science Behind the Flaking: Why Wall Paint Fails on Bathtubs
To understand why a painted bathtub looks like a peeling disaster after only a few weeks of use, our technicians often explain the underlying physics and chemistry of standard paint to our clients. Standard wall paint—typically a water-based latex or acrylic blend—is engineered for drywall, wood, and plaster. As we see time and time again in the field, it is entirely incompatible with non-porous plumbing fixtures for several scientific reasons.
The Problem of Moisture Permeability
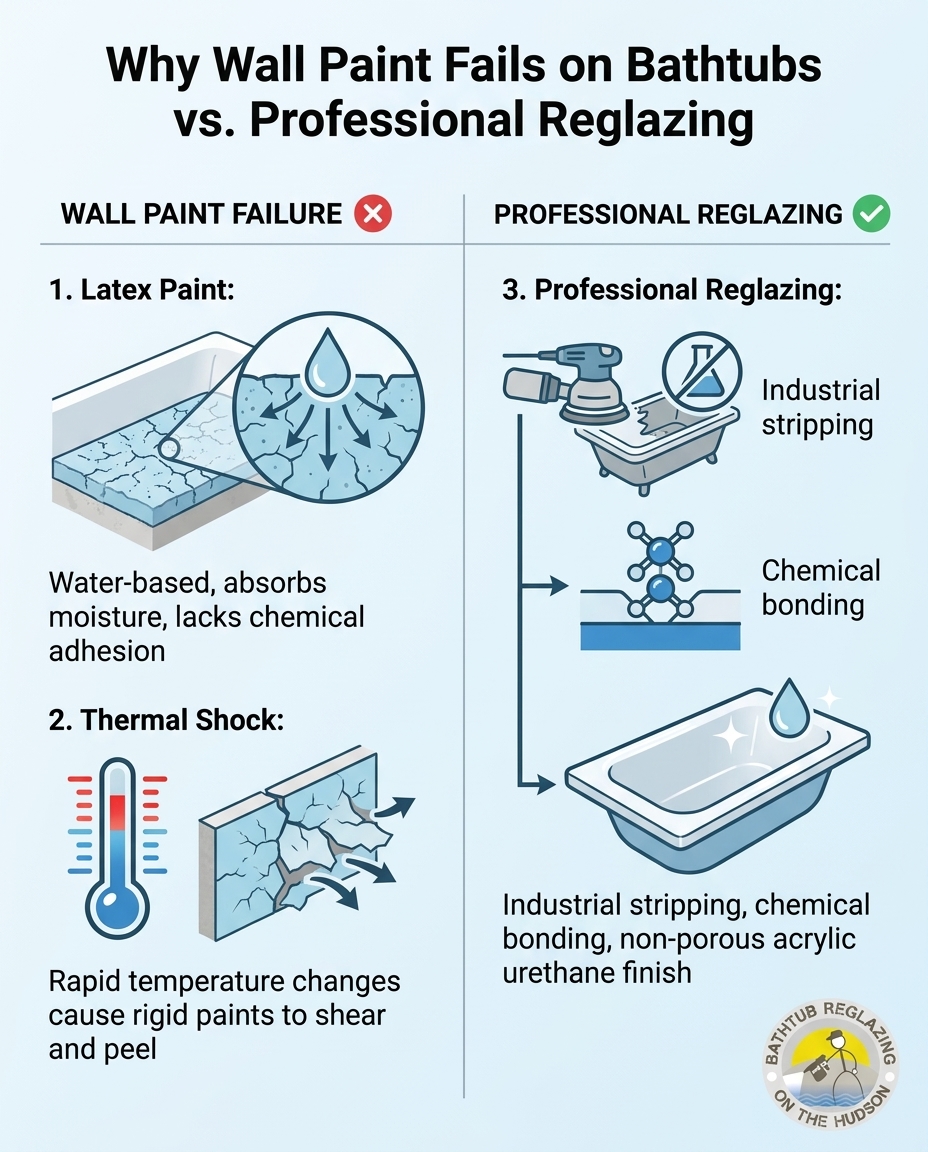
Latex paint is inherently porous and water-based. When applied to a living room wall, this permeability allows the paint to breathe. When applied to a bathtub, however, this same characteristic becomes a fatal flaw. Standing water, steam, and daily showers force moisture directly into the cellular structure of the paint. Instead of repelling the water, the latex absorbs it. In our experience, New York's fluctuating seasonal humidity, especially the shift from humid summers to drier early fall weather, accelerates the degradation, bubbling, and peeling of non-waterproof latex paints in bathrooms. As the paint swells with moisture and then dries out, the structural integrity of the coating is destroyed from the inside out.
Understanding Thermal Shock
Bathtubs undergo extreme and rapid temperature changes on a daily basis. When you turn on the hot water, the surface temperature of the tub spikes in a matter of seconds. This rapid shift causes the underlying substrate (whether steel, cast iron, or fiberglass) to expand slightly. This phenomenon is known as thermal shock. The professional reglazing compounds our team uses are formulated with specific flexing agents that allow them to expand and contract alongside the tub. Standard wall paint, on the other hand, is rigid. When the tub expands under hot water, the rigid latex shears, cracks, and detaches from the surface.
The Lack of Chemical Adhesion
Perhaps the most significant reason we see wall paint fail is the lack of chemical adhesion. Drywall is porous, meaning paint can soak into the micro-cavities of the surface to create a strong mechanical bond. A bathtub's original porcelain or enamel finish is completely non-porous. Without the use of industrial etching agents and specialized aerospace-grade bonding primers, wall paint simply sits on top of the surface like a tight sheet. The moment that sheet is pierced by a dropped shampoo bottle or weakened by moisture, the lack of adhesion causes it to pull away in large, rubbery strips. Our crew finds this failure is inevitable in Peekskill NY and Hudson Valley older homes where vintage tubs have been improperly coated without any foundational prep work.
Identifying Latex Paint Failures on Vintage Tubs
Before our team can properly address a failing bathtub surface, we must identify exactly what material is currently failing. Natural wear and tear on an original cast iron or porcelain tub looks vastly different than a failing layer of DIY wall paint. Homeowners in Peekskill NY and Hudson Valley older homes often inherit these disguised fixtures, calling us under the assumption the tub itself is rotting, when in reality, we discover it is only a superficial layer of incorrect paint that is deteriorating.
Visual signs our technicians look for that indicate your tub was painted with wall paint:
• Rubbery peeling: Standard latex paint maintains a slightly elastic, rubbery texture. When it fails, you can often grab an edge and pull it away in long, stretchy strips.
• Large surface bubbles: Because the paint cannot bond to the non-porous surface, trapped moisture creates large, visible blisters or bubbles under the paint film, especially near the drain or water line.
• Chalky residue: As water-based paint breaks down under the constant barrage of hot water and soap scum, it often leaves a dull, chalky film on the surface that transfers to your skin or cleaning sponges.
• Revealing original colors: Peeling white paint that reveals a pristine avocado green, harvest gold, or baby blue surface underneath is the hallmark sign of a flipper's cosmetic cover-up.
Contrast this with the natural wear of original porcelain or cast iron. Authentic vintage finishes may become dull over decades of harsh cleaning, and they may chip if struck by a heavy object, but they will never bubble or peel in sheets. If you notice these rubbery, peeling symptoms, it is critical to identify the material before attempting any scrubbing or repairs. Recognizing a latex failure is the first step in determining that you need professional refinishing services rather than standard cleaning.
The Mandatory Step: Intensive Professional Stripping
Fixing a latex paint disaster is not just a matter of painting over the peeling sections. At Bathtub Reglazing On The Hudson, the most critical phase of our restoration process for an improperly painted tub is the complete and total removal of the failed layer. This intensive preparatory phase must be handled by professionals, as it forms the foundation for the new finish. If even a microscopic amount of the old, failing latex is left behind, the new industrial-grade reglazing compound will eventually fail at that exact spot.
The Chemical Removal Process
Our professional tub restorers utilize industrial-strength chemical strippers designed to break down the molecular bonds of the incorrect paint without damaging the original cast iron or steel substrate beneath it. This is a rigorous, highly toxic process that requires specialized ventilation equipment, full-face respirators, and heavy-duty protective gear. The stripping agents liquefy the old latex and epoxy, allowing our technicians to meticulously scrape the tub back to its factory-original bare surface.
Surface Neutralization and Prep
Once the old paint is removed, the tub cannot simply be sprayed. The chemical strippers must be thoroughly neutralized, and our team ensures the entire surface is degreased and acid-etched. This etching process creates microscopic pores in the original non-porous surface, providing the necessary mechanical grip for the aerospace-grade bonding primers we use in modern reglazing. Our expert, intensive stripping process is a non-negotiable standard for safely removing incorrect wall paint and ensuring long-term durability. We never cut corners on prep work, because the prep work dictates the lifespan of the final finish.
This rigorous approach consistently yields remarkable results for our clients. During a recent early fall (pre-holiday guest bathroom preparation) project our team handled involving two tubs in a local building that required extensive reglazing work, meticulous stripping and surface preparation allowed both heavily compromised fixtures to come out looking like new. The intensive stripping phase is the defining difference between a temporary cosmetic fix and permanent professional tub restorations.
Why DIY Removal and Repainting Is Not the Answer
When homeowners discover peeling wall paint in their bathtub, the immediate temptation is often to head to the local hardware store for a jug of paint stripper and a DIY tub epoxy kit. We strongly discourage attempting to strip and repaint a bathtub yourself, not just because of the subpar aesthetic results we frequently have to fix, but due to serious safety hazards and material limitations.
Over-the-counter chemical strippers are either too weak to effectively remove multiple layers of failed paint, or they are highly caustic and emit dangerous fumes. Using these chemicals in a small, poorly ventilated residential bathroom creates a significant respiratory and fire hazard. Furthermore, consumer-grade epoxy kits lack the chemical bonding agents and the acrylic urethane durability of our professional compounds. They are notorious for yellowing, turning brittle, and eventually chipping away within a year of application.
• Chemical Stripping — DIY Removal & Repainting: Weak OTC strippers; high risk of toxic fume buildup in small bathrooms. — Professional Stripping & Reglazing: Industrial agents with professional exhaust ventilation systems used by our experts.
• Surface Prep — DIY Removal & Repainting: Manual sanding, which fails to create the micro-pores needed for adhesion. — Professional Stripping & Reglazing: Chemical etching and aerospace-grade bonding primers for maximum grip.
• Coating Material — DIY Removal & Repainting: Consumer epoxy kits that yellow, turn brittle, and chip rapidly. — Professional Stripping & Reglazing: Non-porous acrylic urethane that flexes with thermal shock.
• Longevity — DIY Removal & Repainting: Often fails within 6 to 12 months, leading to compounding issues. — Professional Stripping & Reglazing: Provides a mirror-smooth finish designed to last for over a decade.
Attempting to fix a previous painter's failure often leads to compounding issues. In one instance where we were called in after previous painters had failed and left a difficult bubbling issue on a tub, our professional intervention was required to completely strip the botched layers, resolve the bubbling, and guarantee the final work. Relying on our team from the start saves significant time, money, and frustration in the long run. For homeowners in Peekskill NY and Hudson Valley older homes, understanding the vast quality gap between hardware store kits and commercial applications is crucial when evaluating bathtub reglazing vs. replacement.
Restoring Your Tub's Finish Before the Holidays
If you are dealing with a peeling, heavily degraded bathtub, timing your restoration project appropriately can save you significant stress. The timeline for our professional stripping and reglazing projects is highly efficient, but it does require a strict curing period before the fixture can be exposed to water.
While the physical work of stripping the old latex paint, neutralizing the surface, applying the bonding agents, and spraying the acrylic urethane is often completed by our crew in a single day, the tub is not immediately ready for a shower. The new finish must cure properly to achieve its full chemical hardness. Depending on the specific compounds used and the ambient humidity, this curing process typically requires 24 to 48 hours of completely dry, undisturbed resting time. Exposing the tub to water, soap, or heavy weight before the cure is complete will compromise the structural integrity of the glaze.
Because of this mandatory downtime, our experts highly recommend scheduling your restoration during early fall (pre-holiday guest bathroom preparation). Addressing a peeling DIY disaster before the busy holiday season ensures that your guest bathrooms are fully restored, fully cured, and ready for heavy use by visiting family and friends. Additionally, fall weather provides ideal ambient conditions for proper ventilation and curing, avoiding the extreme humidity of summer and the bitter cold drafts of deep winter. Once the tub is fully cured, maintaining that brilliant shine requires only gentle, non-abrasive tub cleaning methods to keep the surface looking pristine for years.
Frequently Asked Questions About Painted Bathtubs
At Bathtub Reglazing On The Hudson, we frequently encounter improperly painted fixtures in Peekskill NY and Hudson Valley older homes. Below are the direct, authoritative answers our team provides to the most common questions regarding failing wall paint and the professional reglazing process.
What happens if you use regular paint on a bathtub?
Regular paint will quickly absorb water, bubble, and peel away due to thermal shock and lack of adhesion. Because standard interior latex or acrylic paint is highly porous, it acts like a sponge in a wet environment. When exposed to the rapid temperature changes of hot shower water, the rigid paint shears away from the non-porous tub surface, resulting in large, rubbery flakes clogging your drain.
Can a previously painted tub be reglazed?
Yes, but the existing paint must be entirely removed through professional chemical stripping before new glaze is applied. Our reglazing technicians cannot simply spray professional acrylic urethane over failing latex, as the new finish would only be as strong as the weak layer beneath it. Once our team strips the tub back to its original bare substrate, the standard reglazing process can safely proceed.
Can you paint over a painted bathtub?
No. Adding more paint over failing latex will only trap moisture and cause the new layer to peel off alongside the old one. If the underlying bond is already compromised, any subsequent layers will inevitably detach. The only permanent solution we offer is the complete removal of all aftermarket coatings followed by professional surface etching and reglazing.
How do you remove latex paint from a bathtub?
Removal requires industrial chemical strippers and specialized scraping tools used by licensed professionals to avoid damaging the substrate. Because these chemicals emit strong, potentially hazardous fumes, our technicians employ heavy-duty exhaust systems to safely vent the bathroom during the process. Attempting this removal with over-the-counter hardware store strippers is highly discouraged due to safety risks and low effectiveness.
What is the difference between epoxy, acrylic, and latex on a tub?
Latex is porous and fails in water; consumer epoxies yellow and chip; professional acrylic urethanes chemically bond for a durable, non-porous finish. Latex is meant for drywall, while consumer epoxy kits are rigid and prone to cracking under thermal shock. The professional acrylic urethane we use is specifically engineered to flex with the temperature changes of a bathtub while maintaining a brilliant, glass-like seal.
How long does the stripping and reglazing process take?
While the physical work is often completed by our crew in one day, the stripping adds significant prep time, and the tub must cure fully before use. A standard reglazing job might take three to four hours, but stripping a previously painted tub can easily double the labor time. Following the application, the tub must remain completely dry for 24 to 48 hours to allow the new finish to harden completely.
Consult a Local Expert for Your Tub Restoration
Discovering that your bathtub was cheaply painted with latex wall paint can be incredibly frustrating, but as we assure our clients, it is far from a permanent disaster. While a peeling, bubbling tub looks unsalvageable, it is entirely fixable with the right technical approach. The secret to a lasting restoration lies not in covering up the problem, but in the meticulous, intensive professional stripping process our team uses to remove the failure at its source.
By relying on expert chemical removal and industrial-grade acrylic urethane, Bathtub Reglazing On The Hudson can rescue even the most heavily compromised vintage fixtures. If you are aiming for early fall (pre-holiday guest bathroom preparation), now is the ideal time to address that peeling eyesore. Reach out to our local reglazing experts today to schedule an inspection, assess the condition of your peeling tub, and secure a lasting, mirror-smooth finish before your seasonal guests arrive.
Schedule Service
Thank you! Your submission has been received!
Oops! Something went wrong while submitting the form.
Other Blogs
Customer Testimonials
Hear what customers are saying about our professional refinishing and outstanding results.

Can’t say enough about Maurice. From start to finish great communication his work is incredible and he stands by it very competitive pricing just all-around good guy the work was done quick and kept very clean and our brand new bathroom
Joey N.
We had a large piece of bathtub glaze chip off. Maurice came in and did a fantastic job. It now looks and works better than before. He went above and beyond the contract by cleaning up the old chipped grout between the tub and the tiles and replacing with brand new.
Bozidar J.
Maurice did a great job on my tub. It looks brand new.
Steven S.