
When the Six-Month Honeymoon Ends: Facing a Peeling Tub
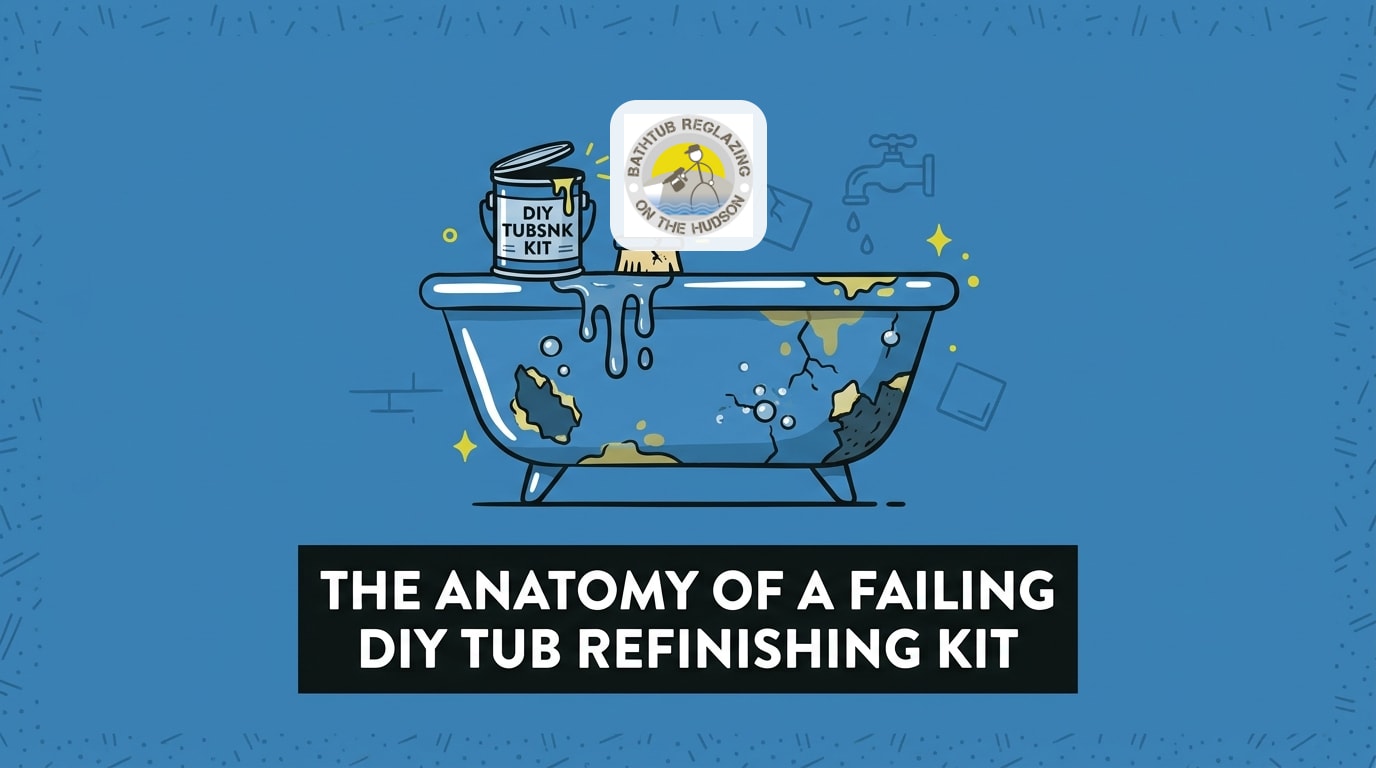
You spent an entire weekend scrubbing, taping, and ventilating your bathroom to apply an over-the-counter epoxy, but now you are staring at the anatomy of a failing DIY tub refinishing kit. At first, the results probably looked fantastic. The surface was glossy, the stains were gone, and the bathroom felt refreshed. But fast forward six months, and that initial satisfaction often turns into deep frustration. What started as a microscopic bubble has now turned into large, unsightly sheets of epoxy peeling away from the tub floor.
If your bathtub is currently flaking, bubbling, or shedding its new coat around the drain, you are not alone. This is a highly common chemical failure, and it rarely means you did anything wrong during your application. Consumer-grade epoxies are inherently limited by their chemical makeup. When faced with daily hot water, soap scum, and friction, these kits simply cannot hold up long-term.
Now, you are standing at a frustrating decision point. Do you buy another kit and attempt a temporary patch over the peeling spots, or is it time to invest in a permanent solution? Before you spend another weekend breathing in fumes, it helps to understand exactly why the coating failed in the first place. By looking at the science behind the peeling, you can make an informed choice about your next steps. For homeowners ready to skip the endless cycle of touch-ups, exploring professional tub refinishing services is often the most cost-effective route. Proper bathtub reglazing involves chemical processes that off-the-shelf kits simply cannot replicate.
The First Signs of Trouble: Bubbles, Flakes, and Peeling Sheets
The problem: The breakdown of a DIY tub kit rarely happens all at once. It usually begins as a subtle imperfection that is easy to ignore. You might notice a tiny, raised bubble near the drain, or a small flake of white paint sitting on the tub floor after a shower. Because the rest of the tub still looks pristine, it is tempting to brush these early warning signs off as minor wear and tear.
The cause: Once the structural integrity of the epoxy coating is breached, water intrusion rapidly accelerates the failure. Water sneaks underneath that tiny flake or compromised edge, getting trapped between the new epoxy and the original porcelain. Because bathtubs are humid environments, this trapped moisture never truly dries. It slowly degrades the weak bond from the inside out. One autumn, we saw a typical pattern regarding bubbling bathtub paint after previous amateur painters had failed on a difficult job; the trapped moisture caused the entire surface to blister until a technician returned to properly address the bubbling, stand by the work, and resolve the difficult problem with a professional, permanent result.
The solution: Once the coating begins to peel in large, rubbery sheets, the entire application is compromised. There is no way to stop the progression once water has breached the barrier. The only true solution at this stage is complete removal of the failed material.
Why the Drain Is Usually Ground Zero
If you inspect a failing DIY tub, you will almost always find that the most severe peeling occurs directly around the drain. There are several structural reasons for this:
• Constant standing water: The area immediately surrounding the drain experiences the most prolonged exposure to pooling water, which tests the limits of any waterproof coating.
• Mechanical wear: This is the area where feet constantly pivot, shift, and scrub, putting immense friction on the brittle epoxy.
• Hardware sealing issues: Consumer kits struggle to create a watertight seal around existing metal drain flanges. Without removing the hardware and applying a professional-grade bonding agent, water easily seeps under the edge of the new paint.
Mechanical Adhesion vs. Chemical Bonding: The Science of Failure
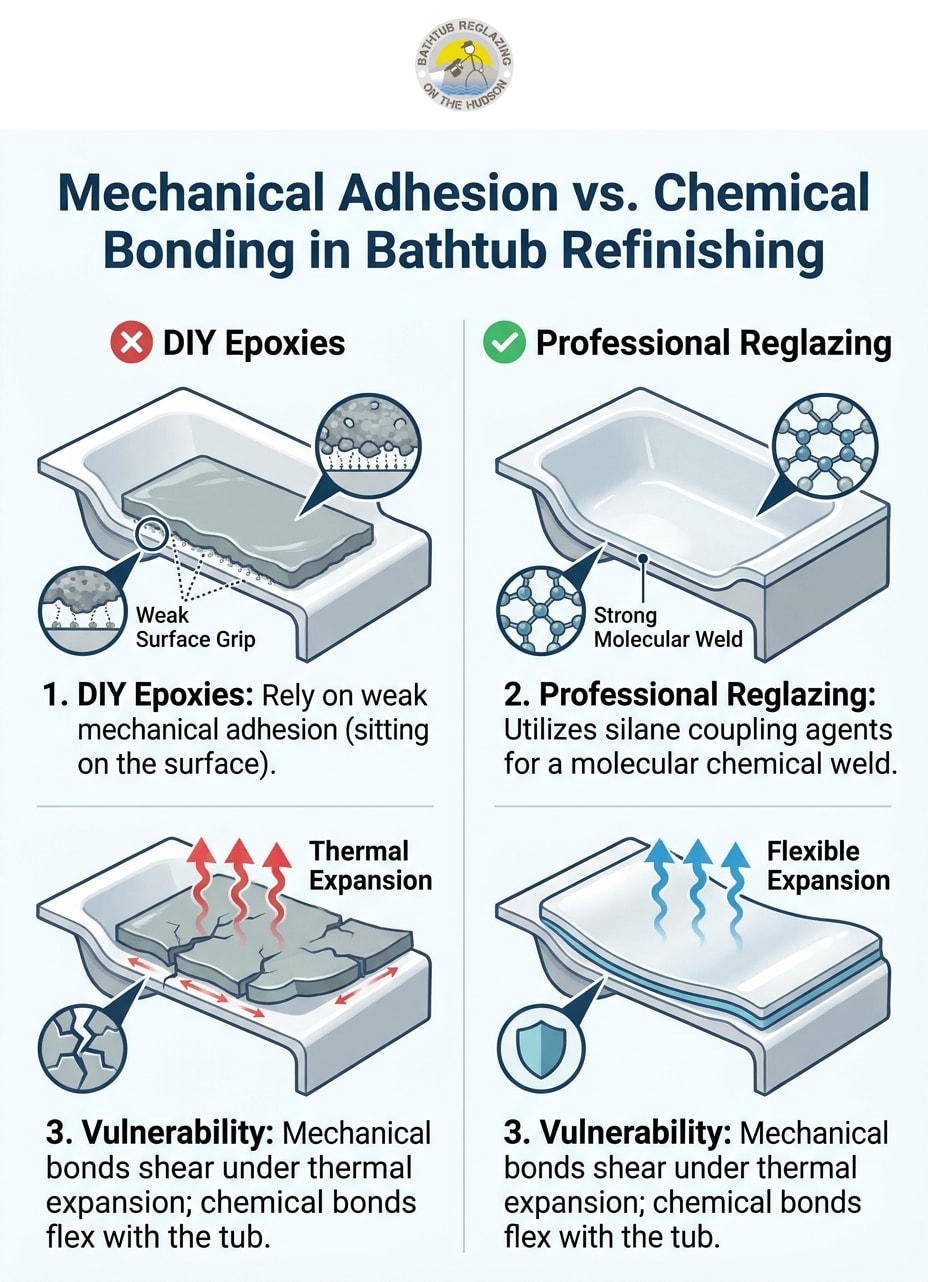
To understand why your bathtub is peeling in sheets, we have to look at the underlying polymer science. The core difference between a weekend project and a permanent restoration comes down to how the new coating attaches to the old surface. Consumer-grade epoxies rely entirely on mechanical adhesion. Professional applications rely on chemical bonding.
Mechanical adhesion means the new coating is essentially just sitting on top of the old surface. When you use sandpaper or an etching powder from a box kit, you are creating microscopic scratches in the original porcelain. The roll-on epoxy seeps into those scratches and hardens, gripping the surface like a heavy, rigid sticker. While this feels secure to the touch, mechanical bonds are inherently weak. They are highly susceptible to shearing forces, daily water exposure, and the physical friction of cleaning brushes.
Chemical bonding, on the other hand, fuses the new glaze to the original bathtub at a molecular level. Professional refinishers achieve this by using silane coupling agents. These advanced aerospace-grade chemicals act as a molecular bridge, chemically welding the new topcoat directly into the atomic structure of the old porcelain. Because the two surfaces become one continuous material, the new glaze cannot peel, flake, or lift away in sheets.
Without this chemical weld, a coating is always temporary. No matter how much time you spend on proper tub surface preparation with sandpaper or household cleaners, a mechanical bond will eventually fail under the daily stress of a busy bathroom.
The Chilling Effect: How Ambient Temperature Halts Epoxy Curing
One of the most overlooked factors in DIY tub refinishing is the strict environmental control required for polymers to cure properly. Epoxy relies on a chemical reaction called cross-linking to harden and gain its waterproof properties. For this cross-linking to occur successfully, consumer epoxies usually require sustained ambient and surface temperatures well above 70 degrees Fahrenheit for several days.
This creates a massive vulnerability for homeowners tackling weekend projects. Mid-fall temperature drops in October create drafty conditions in bathrooms, severely interrupting the epoxy curing process. If the ambient air temperature or the surface temperature of the heavy tub drops below the required threshold, the chemical reaction slows down or halts entirely.
The illusion of a dry tub: The most dangerous part of a temperature-stunted cure is that the epoxy will still feel dry to the touch. You might run your hand over the tub after 48 hours and assume it is ready for water. However, underneath that dry outer skin, the polymer chains have not fully cross-linked. This leaves the coating chemically uncured, highly porous, and incredibly brittle. When you introduce bathwater to an incomplete cure, the epoxy immediately begins absorbing moisture, leading directly to the bubbling and peeling you see months later.
Thermal Shock: The Stress of Hot Water in Older Homes
Beyond chemical bonding and curing temperatures, bathtubs undergo intense physical stress every single day. Materials expand when they get hot and contract when they cool down. Cast iron and heavy steel bathtubs are no exception. While you cannot see it with the naked eye, your bathtub physically swells and shifts when you fill it with hot water.
This dynamic creates a phenomenon known as thermal shock. Older Peekskill NY homes often feature poor bathroom insulation, causing cold tub surfaces that experience extreme thermal shock when filled with piping hot bathwater. The heavy metal of the tub expands rapidly under the sudden heat.
Because consumer-grade epoxy is rigid and brittle—especially if it was applied in less-than-ideal temperatures—it cannot flex or stretch to accommodate the expanding metal beneath it. The weak mechanical bond is placed under immense shearing stress. Eventually, the tension becomes too great, and the brittle epoxy snaps, separating from the porcelain. Once that microscopic break occurs, water enters the void, and the peeling process accelerates rapidly. Professional chemical welds, by contrast, possess the elasticity required to expand and contract seamlessly with the tub substrate.
The Post-Mortem: What It Really Takes to Strip a Failed Coating
When a homeowner realizes their DIY kit has failed, the immediate instinct is often to sand down the peeling edges and paint over the bad spots. Unfortunately, you cannot simply paint over compromised epoxy. The structural integrity of the entire layer is compromised, meaning any new coating applied on top will simply peel away alongside the old one. The entire failed layer must be completely removed.
As professionals who routinely strip these exact consumer-grade failures in the field to apply a proper chemical weld, we perform this post-mortem process frequently. Stripping a botched DIY job is labor-intensive and requires specialized knowledge to avoid damaging the original tub underneath. Here is what the professional removal process actually entails:
1. Chemical stripping: Industrial-grade stripping agents are applied to break down the uncured or partially cured epoxy. These chemicals must be carefully monitored to dissolve the thick layers of paint without harming the underlying porcelain or cast iron.
2. Mechanical removal: Once the epoxy softens, it must be meticulously scraped away by hand. In areas where the mechanical bond was slightly stronger, specialized tools are required to lift the stubborn material without scratching the tub.
3. Surface neutralization: After the old epoxy is removed, the stripping chemicals must be completely neutralized. Any residual chemical left on the tub will immediately destroy the chemical bond of the new application.
4. Sterilization and preparation: Finally, the bare tub is deeply cleaned, etched, and sterilized to create a pristine, contaminant-free surface ready for the silane coupling agents.
This rigorous process highlights why bathtub reglazing in Westchester County requires professional expertise. Attempting to strip a tub yourself often leads to severe surface damage, harsh chemical exposure, and a bathroom that is out of commission for weeks.
Why Patching a Failed Kit Is a Losing Battle
If you are staring at a peeling tub, do not fall into the trap of the endless touch-up. Buying another off-the-shelf kit to patch the flaking areas is a losing battle. New epoxy will not bond to peeling, compromised epoxy. The edges where the old paint meets the new patch will always remain a weak point, allowing water to immediately penetrate the seam.
Homeowners who attempt to patch their tubs often end up with a surface that looks like a patchwork quilt of mismatched whites. The texture becomes uneven, unsightly, and incredibly difficult to keep sanitary, as soap scum and bacteria easily harbor in the rough, peeling edges.
The underlying issue is always a lack of chemical bonding, which a patch kit simply cannot solve. Instead of spending more time and money on temporary fixes that will inevitably fail again, it is time to consider the value of doing the job right. Transitioning to a professional-grade application ensures that the old, failed material is safely removed and replaced with a durable, beautiful, molecularly bonded surface that will withstand the test of time.
Frequently Asked Questions
Why is my DIY tub refinishing peeling so soon?
Your DIY tub refinishing is peeling because consumer kits rely on weak mechanical adhesion rather than chemical bonding. This means the epoxy merely sits on top of the tub like a sticker, making it highly vulnerable to hot water, friction, and daily wear. Additionally, if the bathroom was too cold during application, the epoxy likely failed to cure properly, leaving it brittle and prone to flaking.
Can you fix a peeling refinished tub?
You cannot permanently fix a peeling refinished tub by simply painting over the bad spots. The entire failed coating must be completely stripped down to the original bare surface. Once the compromised epoxy is removed and neutralized, a professional can apply a proper chemical weld and new glaze to restore the tub correctly.
How long does a DIY tub refinishing kit actually last?
A DIY tub refinishing kit typically lasts anywhere from a few months to a couple of years before significant peeling begins. Because these products do not chemically fuse with the bathtub, they cannot withstand the thermal shock of hot water expanding the metal underneath. For a permanent solution that lasts over a decade, professional chemical bonding is required.
How do professionals remove peeling tub epoxy?
Professionals remove peeling tub epoxy using industrial-grade chemical strippers that dissolve the failed coating without damaging the original porcelain beneath it. After carefully scraping away the softened material, the entire surface is neutralized, heavily sterilized, and prepped to ensure no residual chemicals interfere with the new application.
Is it safe to use a bathtub with peeling epoxy paint?
It is generally not recommended to continue using a bathtub with peeling epoxy paint. The jagged, flaking edges can be sharp and uncomfortable, and the exposed areas trap moisture, soap scum, and bacteria, making the tub very difficult to keep sanitary. Furthermore, loose flakes of dried epoxy can easily detach and clog your plumbing system.
Dealing with the anatomy of a failing DIY tub refinishing kit is a frustrating experience, but it does not mean your bathtub is ruined forever. By understanding the mechanical limitations of off-the-shelf epoxies, you can stop wasting weekends on temporary patches. If you are ready for a clear, durable, and permanent fix, professional stripping and reglazing will provide the flawless, molecularly bonded finish your bathroom deserves.
Schedule Service
Thank you! Your submission has been received!
Oops! Something went wrong while submitting the form.
Other Blogs
Customer Testimonials
Hear what customers are saying about our professional refinishing and outstanding results.

Can’t say enough about Maurice. From start to finish great communication his work is incredible and he stands by it very competitive pricing just all-around good guy the work was done quick and kept very clean and our brand new bathroom
Joey N.
We had a large piece of bathtub glaze chip off. Maurice came in and did a fantastic job. It now looks and works better than before. He went above and beyond the contract by cleaning up the old chipped grout between the tub and the tiles and replacing with brand new.
Bozidar J.
Maurice did a great job on my tub. It looks brand new.
Steven S.