

The Reality of Severe Bathtub Damage: When a Massive Chip Strikes
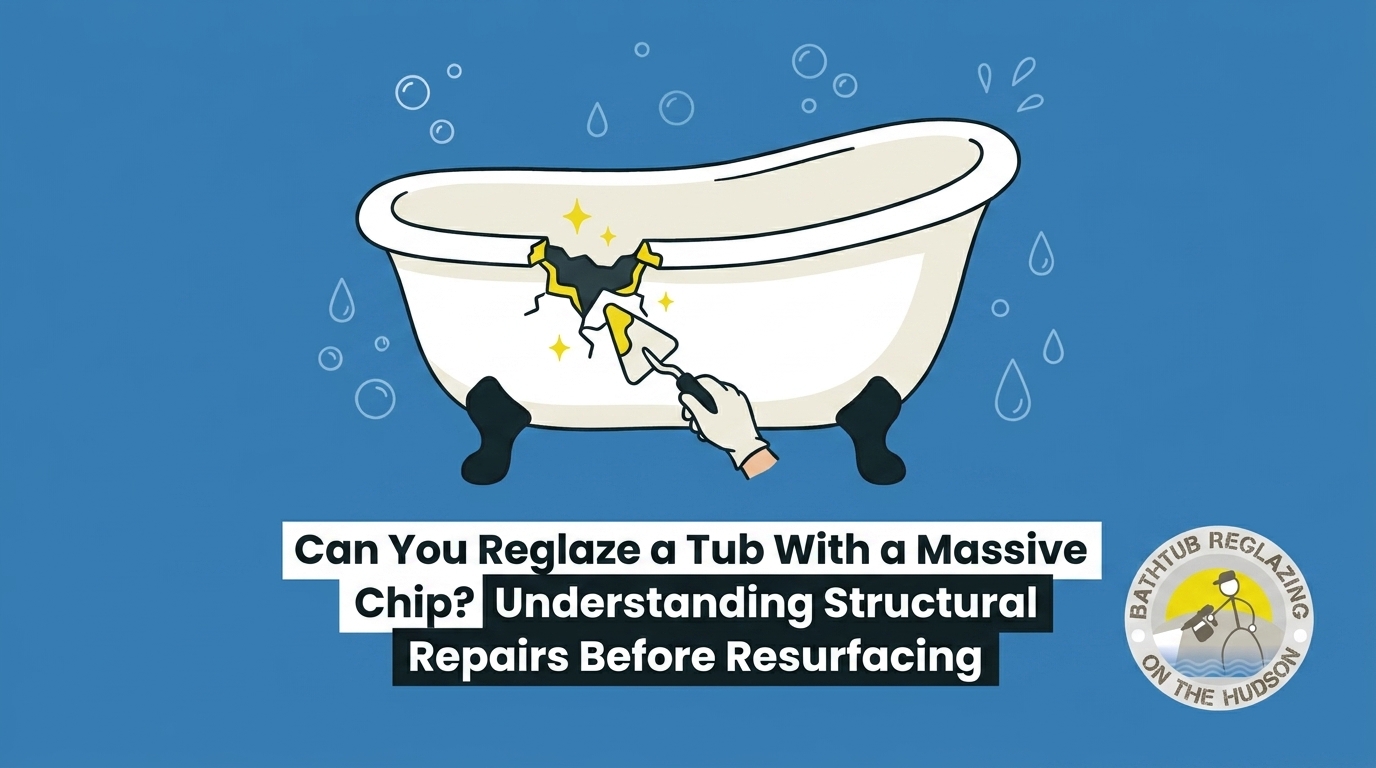
At Hudson Tubs, we frequently get calls from Peekskill homeowners after a heavy shampoo bottle slips from their hand, or a metal shower caddy falls from the wall. The impact leaves behind a deep, jagged crater in the bathtub. If you are staring at the exposed material underneath, you are likely asking: can you reglaze a tub with a massive chip? A look at structural repairs before resurfacing reveals that a flawless finish is entirely possible, but only if the foundation is properly rebuilt first.
This type of damage goes far beyond a cosmetic scratch. A massive chip completely penetrates the protective surface glaze, exposing the raw, vulnerable foundation underneath to daily moisture. Every time you turn on the shower, water interacts directly with the unprotected core of the fixture. Homeowners often face a critical decision point right here: can this severe damage be covered up, or is the entire fixture ruined?
The short answer is that a professional bathtub reglaze is an excellent solution. However, you cannot simply spray a new coating over a deep void. In our experience, the structural integrity of the damaged area must be fully restored before any new finish is applied.
Understanding the Depth of the Damage
Not all bathtub damage is created equal. To understand why massive chips require structural intervention, it helps to look at the anatomy of the damage.
• Superficial Scratch — Characteristics: Only affects the top clear coat or color layer. — Impact on the Fixture: Cosmetic issue; no raw material is exposed to water. — Required Action: Standard sanding and reglazing.
• Minor Chip — Characteristics: Small indentation, but the base material remains mostly covered. — Impact on the Fixture: Slight risk of moisture trapping over time. — Required Action: Light surface filling and smoothing.
• Massive Chip — Characteristics: Deep crater exposing the raw cast iron or fiberglass tub substrate. — Impact on the Fixture: High risk of rapid structural deterioration and severe water damage. — Required Action: Chemical neutralization and full structural rebuild.
When a massive chip exposes the cast iron or fiberglass tub substrate, the clock starts ticking. The longer that raw material sits open to the environment, the more complicated the eventual restoration becomes.
The Hidden Danger of Ignoring Deep Voids Before Resurfacing
The Problem: A resurfacing coating is only as strong as the foundation it is applied to. When a tub has a massive chip, the immediate temptation is to simply paint or spray over it to hide the ugly dark spot. However, applying new glaze directly over a massive void guarantees premature coating failure.
The Cause: Liquid glaze is designed to lay flat. If it is sprayed over a deep depression, the liquid sags into the void as it cures. This creates a weak point in the new surface. More importantly, if the exposed substrate has already absorbed moisture—especially common given New York's late-summer humidity—that moisture becomes permanently trapped beneath the new coating. Our technicians routinely see the aftermath of this mistake: the trapped water vapor attempts to expand, creating upward hydrostatic pressure against the fresh glaze.
The Solution: The void must be completely filled and leveled to create a seamless, impenetrable barrier. If you skip this step, the trapped moisture inevitably leads to bubbling and delamination of the entire newly applied surface. You will quickly notice several warning signs of preventing bathtub surface deterioration failures:
• Blistering and Bubbling: Small, raised pockets appear around the site of the original chip as trapped moisture expands.
• Flaking Edges: The new glaze begins to peel away from the edges of the depression because it never formed a true chemical bond.
• Hollow Sounds: Tapping near the repaired area produces a hollow sound, indicating the coating has separated from the tub surface.
• Musty Odors: Trapped water underneath the glaze can harbor mold and mildew, leading to persistent bathroom odors.
By properly filling the void before applying the topcoat, our professionals ensure that the new surface remains completely watertight, regardless of how much late-summer humidity fills the bathroom.
Assessing the Damage: Cast Iron vs. Fiberglass Substrates
In our years of restoring fixtures across the region, we've found that the method used to repair a massive chip depends entirely on what the bathtub is made of. Different materials react to trauma and moisture in drastically different ways. Proper identification of the cast iron or fiberglass tub substrate dictates the specific chemical bonding agents required for a permanent repair.
The Threat to Cast Iron Substrates
Cast iron tubs are incredibly durable, but they have one major weakness: rust. When a heavy impact chips away the protective porcelain enamel, the raw iron underneath is instantly exposed to oxygen and water. In a bathroom environment, exposed cast iron oxidizes rapidly. Within days, a thin layer of orange rust begins to form inside the crater.
If you attempt to apply a filler directly over this rust, the repair will fail. Rust is essentially a layer of loose, flaking dust. The filler will bond to the rust rather than the solid iron, and the entire patch will eventually pop out. Therefore, exposed cast iron requires immediate rust neutralization. Our professionals use specific chemical agents to convert the active iron oxide back into an inert surface before any filling occurs.
The Threat to Fiberglass Substrates
Fiberglass bathtubs face a completely different set of challenges. When a massive chip penetrates the gel coat of a fiberglass unit, it exposes the woven glass fibers and resin layers underneath. Unlike iron, fiberglass does not rust—but it does absorb water.
If water intrudes through a deep chip in a fiberglass tub, it can travel horizontally between the layers of the material. This causes structural delamination, where the tub actually begins to separate from the inside out. The material becomes soft, spongy, and prone to cracking under the weight of a person standing in the shower.
Both of these materials require specialized, marine-grade epoxies or poly-resins to rebuild the missing structure. Standard surface putty from a hardware store lacks the chemical properties needed to bond permanently to a raw cast iron or fiberglass tub substrate.
How Professional Grade Resins Rebuild the Bathtub's Foundation
Structurally filling a massive chip is a highly technical process. As we often explain to our clients, it is not a matter of simply pressing putty into a hole. Our team's comprehensive structural repair process expertly fills massive chips to ensure the new glaze bonds flawlessly, which is a critical step that over-the-counter DIY kits completely miss.
To create a repair that will last for years, our technicians follow a strict methodology to rebuild the tub's foundation from the substrate up.
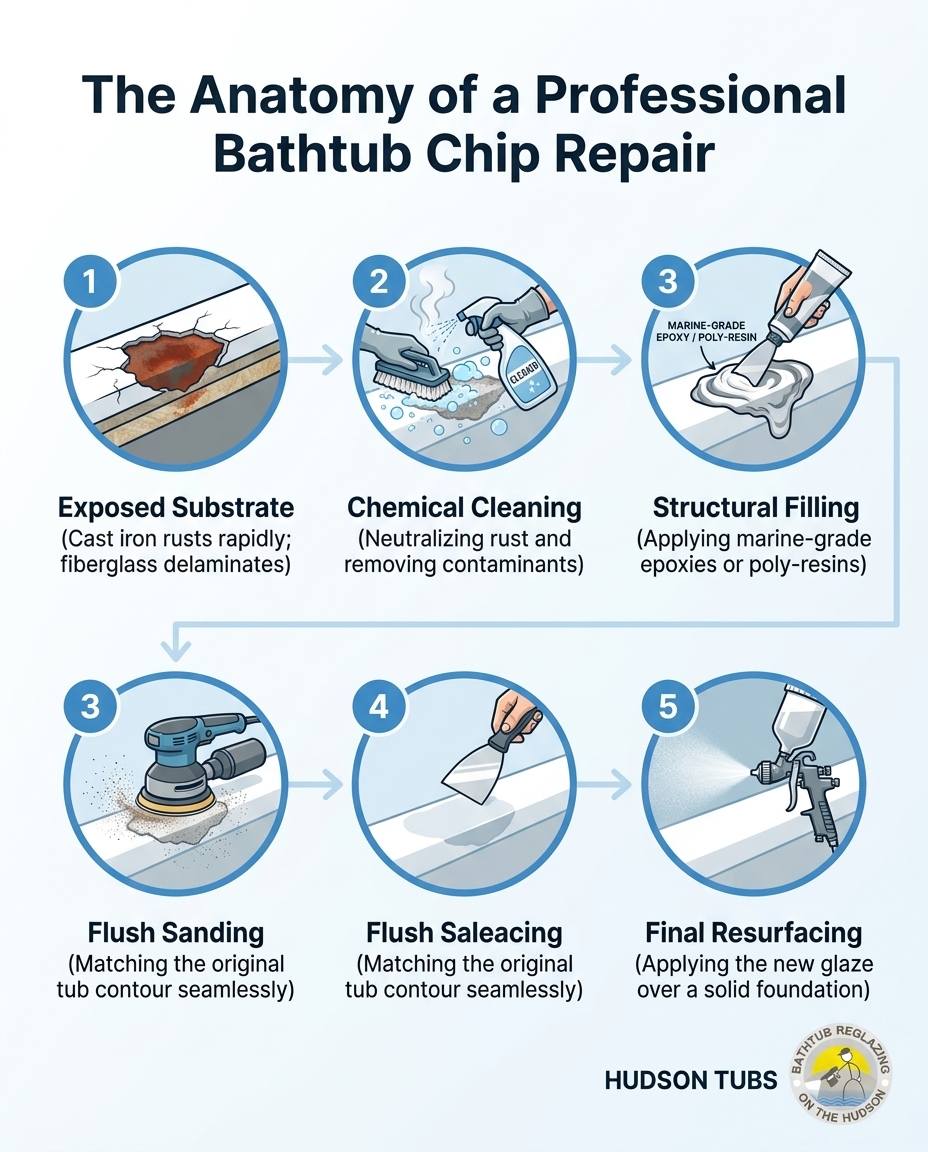
1. Chemical Cleaning and Neutralization: The first step involves removing all soap scum, body oils, and mineral deposits from the void. If the tub is cast iron, rust neutralizers are applied. If it is fiberglass, the compromised, spongy edges are carefully trimmed away to reveal solid, dry material. This ensures maximum adhesion for the filler.
2. Application of Structural Fillers: Technicians mix and apply specialized structural fillers that chemically bond to the specific cast iron or fiberglass tub substrate. These marine-grade epoxies are designed to cure into a material that is often harder than the tub itself. The filler is applied slightly higher than the surrounding surface to allow for proper shaping.
3. Flush Sanding and Contouring: Once the resin is fully cured, it is meticulously sanded down. The goal is to make the repair completely flush with the original contour of the tub. When you run your hand over the repaired area, you should not be able to feel where the chip used to be.
4. Primer and Final Resurfacing: With the structural rebuilding complete, a seamless, impenetrable foundation now exists. The technician can then apply the professional bonding primers and the final high-gloss topcoat, completely hiding the massive repair beneath a beautiful new finish.
Addressing the Perimeter: Why Failing Grout Exacerbates Chipped Glaze
The Problem: Water intrusion does not just happen at the direct site of the massive chip. Often, the conditions that lead to severe tub damage also point to broader maintenance issues in the bathroom. One of the most common related issues our crew encounters is failing grout lines along the perimeter of the tub.
The Cause: When grout lines crack, crumble, or wash away, they leave an open seam between the bathtub and the wall. Water easily flows into these gaps. Through capillary action, this moisture can be drawn behind the tub and toward the exposed substrate of the massive chip. Failing grout lines trap moisture against the edges of the tub, compounding the risk to any newly applied glaze. High levels of late-summer humidity only accelerate this moisture-trapping effect, preventing the hidden areas behind the tub from ever fully drying out.
The Solution: A comprehensive restoration requires looking at the entire fixture environment, not just the single chip. This involves stripping out compromised, moldy grout and re-sealing the entire perimeter with high-quality, mold-resistant sealants. Securing the surrounding bathtub tile surround ensures the bathtub's new finish isn't undermined by adjacent moisture leaks.
Signs Your Perimeter Needs Attention:
• Discolored or Blackened Grout: Indicates deep-seated mold growth fueled by trapped moisture.
• Missing Chunks of Caulk: Visible gaps where the tub meets the tile wall.
• Soft Wall Spots: Pressing on the tiles near the tub edge reveals a spongy, yielding sensation.
• Persistent Dampness: The corners of the tub remain wet long after the shower has been turned off.
Why Rigid DIY Patches Fail Under Seasonal Stress
We often arrive at homes where residents have attempted a quick fix for a massive chip using an over-the-counter DIY repair kit. While these kits might temporarily hide the ugly black spot, they almost always fail under structural and environmental stress. Understanding the physics of a bathtub explains why these rigid patches pop out so frequently.
The Reality of Thermal Expansion
Bathtubs undergo constant, extreme temperature changes. When you turn on a hot shower, the surface of the tub rapidly heats up. When the water drains and the room cools, the tub temperature drops. Furthermore, New York's fluctuating indoor temperatures and heavy late-summer humidity cause significant seasonal shifts in the home's framing and bathroom environment.
This constant cycle of heating and cooling causes the bathtub material to expand and contract. This is known as thermal expansion. The tub is literally shifting and moving on a microscopic level every single day.
The Limitations of DIY Materials
Over-the-counter DIY kits typically rely on superficial putty that lacks true chemical bonding properties. They are often rigid and brittle once cured. Because these rigid, non-professional patches cannot flex with the substrate, the constant thermal expansion and contraction of the tub eventually breaks the weak bond. The patch will crack, lift at the edges, or pop out completely, leaving you right back where you started.
Only professional-grade resins possess the necessary elasticity and tensile strength to withstand these daily temperature shifts. They expand and contract at a similar rate to the tub itself, ensuring the repair remains structurally sound year after year. This is why our team emphasizes that relying on professional bathtub reglazing services in Orange County is critical for massive chips; the materials used are engineered to handle the specific environmental stresses of the region.
Secure Your Bathtub's Structural Integrity Before Resurfacing
A massive chip does not mean your bathtub is destined for the landfill. By addressing the structural damage first, you can save the fixture and restore its original beauty. The key is recognizing that deep voids expose the vulnerable substrate to moisture, requiring specialized, marine-grade epoxies to rebuild the foundation properly.
Whether your tub is made of heavy cast iron or layered fiberglass, a flawless, long-lasting finish is entirely possible when the right preparation steps are taken. By ensuring the void is chemically cleaned, structurally filled, and sanded perfectly flush, the new coating will bond securely and withstand daily use. If you are dealing with severe fixture damage, scheduling a professional tub restoration ensures the repair is handled with the technical precision required for a permanent solution.
Frequently Asked Questions
Can you reglaze a badly chipped tub?
Yes, a badly chipped tub can absolutely be reglazed, provided the structural damage is addressed first. Professionals must clean the exposed substrate and fill the deep void with specialized marine-grade epoxies. Once the filler cures and is sanded completely flush with the surrounding surface, the entire tub can be primed and reglazed. Skipping the structural fill will result in the new glaze failing prematurely.
How big of a chip can be repaired in a bathtub?
Our team can repair surprisingly large chips, sometimes spanning several inches across, as long as the underlying structure of the tub remains sound. The size of the chip matters less than the proper application of structural resins to rebuild the missing area. If the damage has caused a full crack through the entire body of the tub, causing it to leak onto the floor below, a different level of structural reinforcement may be required.
Do you have to fix chips before reglazing?
Yes, fixing chips before reglazing is a mandatory step for a successful restoration. If you spray liquid glaze over a deep chip, the coating will sag into the depression, creating an uneven surface and a weak point in the finish. Furthermore, any moisture trapped in the raw substrate will eventually cause the new glaze to bubble and peel away from the tub.
What happens if water gets under bathtub glaze?
When water gets under bathtub glaze, it becomes trapped and attempts to expand as water vapor. This creates hydrostatic pressure that pushes up against the bottom of the coating, leading to visible bubbling, blistering, and eventual peeling. In cast iron tubs, trapped water also accelerates rust formation, which completely destroys the bond between the tub and the glaze.
Why do DIY bathtub chip repairs fail?
DIY bathtub chip repairs typically fail because over-the-counter putties lack the chemical bonding properties and elasticity of professional resins. Bathtubs constantly expand and contract due to temperature changes from hot water. Rigid DIY patches cannot flex with the tub, causing them to crack, loosen, and eventually pop out under normal seasonal and daily stress.
How do professionals match the repaired chip to the rest of the tub?
Professionals ensure the repair is invisible by meticulously sanding the cured structural resin until it is perfectly flush with the original contour of the tub. Once the physical shape is restored, the entire bathtub is coated in a new, continuous layer of high-gloss glaze. Because the entire fixture receives a fresh topcoat, there are no mismatched color patches or visible seams left behind.
Schedule Service
Thank you! Your submission has been received!
Oops! Something went wrong while submitting the form.
Other Blogs
Customer Testimonials
Hear what customers are saying about our professional refinishing and outstanding results.

Can’t say enough about Maurice. From start to finish great communication his work is incredible and he stands by it very competitive pricing just all-around good guy the work was done quick and kept very clean and our brand new bathroom
Joey N.
We had a large piece of bathtub glaze chip off. Maurice came in and did a fantastic job. It now looks and works better than before. He went above and beyond the contract by cleaning up the old chipped grout between the tub and the tiles and replacing with brand new.
Bozidar J.
Maurice did a great job on my tub. It looks brand new.
Steven S.